
How to Build Outdoor Steps
Outdoor steps are an essential part of any home that has a deck or patio. They provide a safe and convenient way to access the outdoor space and can add value to your property. Building outdoor steps may seem like a daunting task, but with the right tools and materials, it can be a straightforward DIY project. In this article, we'll guide you through the steps to build outdoor steps that are safe, sturdy, and attractive.
Materials You'll Need
The first step in building outdoor steps is to gather all the necessary materials. You'll need:
- Concrete mix
- Gravel
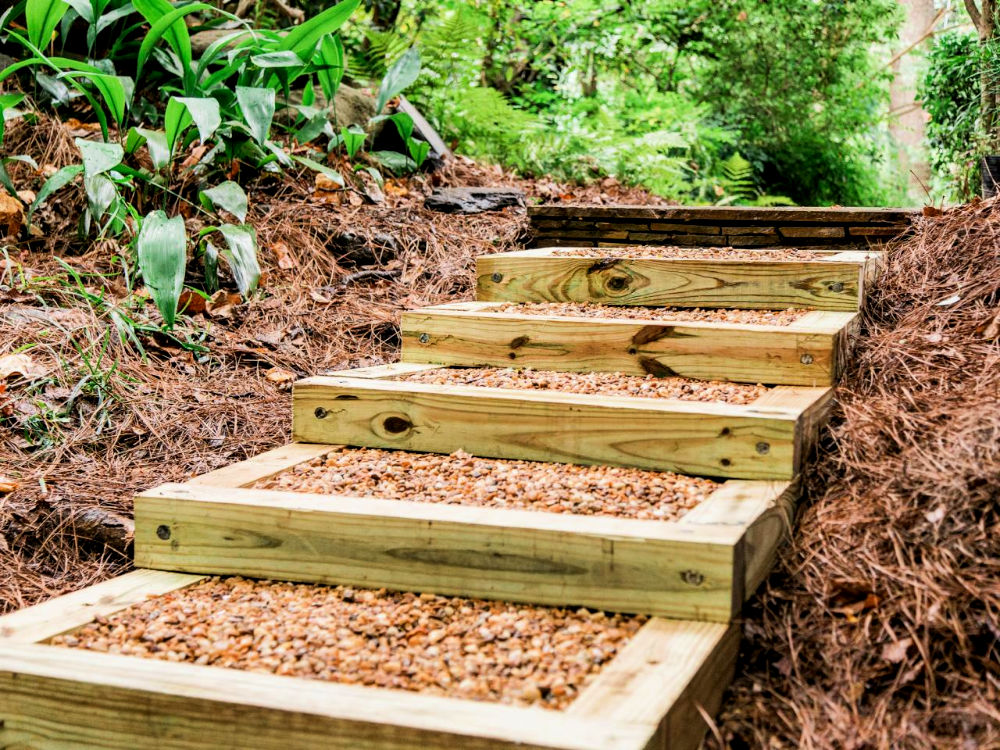
- Wooden boards
- Screws and nails
- Hand saw
- Drill
- Level
- Tape measure
- Shovel
- Wheelbarrow
Planning and Preparation
Before you start building, you need to plan and prepare the site where you'll be placing the steps. Here are the steps you need to follow:
Step 1: Measure the Area
Measure the area where you want to build the steps. Make sure you have enough space to install the steps and that the area is flat and level.
Step 2: Mark the Area
Use a string or a garden hose to mark the area where you want to install the steps. This will help you visualize the final result and give you an idea of the size and shape of the steps.
Step 3: Prepare the Site
Remove any grass or vegetation from the marked area. Dig a trench for the steps and make sure it's deep enough to hold the concrete base. Use a level to ensure that the trench is even.
Building the Steps
Now that you've prepared the site, it's time to start building the steps. Here are the steps you need to follow:
Step 1: Build the Base
Mix the concrete according to the manufacturer's instructions. Pour the concrete into the trench and smooth it out with a trowel. Let it dry for at least 24 hours.
Step 2: Build the Frame
Use wooden boards to build the frame for the steps. Cut the boards to the right size and use screws and nails to attach them together. Make sure the frame is level and square.
Step 3: Place the Frame
Place the frame over the concrete base. Use a level to make sure it's even. Screw the frame into the concrete base to secure it in place.
Step 4: Add the Treads
Cut wooden boards to the right size for the treads. Place them on top of the frame and screw them into place. Make sure they're evenly spaced and level.
Step 5: Add the Riser Boards
Cut wooden boards to the right size for the riser boards. Attach them to the frame with screws and nails. Make sure they're evenly spaced and level.
Advantages and Disadvantages of Building Outdoor Steps
Building outdoor steps has its advantages and disadvantages. Here are some of them:
Advantages
- Provides safe and convenient access to the outdoor space
- Adds value to your property
- Can be a DIY project, saving you money on labor costs
Disadvantages
- Can be time-consuming and labor-intensive
- Requires some knowledge of construction and carpentry
- May require a building permit or inspection
Conclusion
Building outdoor steps can be a challenging but rewarding DIY project. With the right tools and materials, you can create steps that are safe, sturdy, and attractive. However, it's important to plan and prepare the site carefully and follow the steps carefully to ensure a successful outcome.
FAQ
Q: Do I need a building permit to build outdoor steps?
A: It depends on your local building codes. Check with your local building department to see if a permit is required.
Q: What type of wood is best for outdoor steps?
A: Cedar, redwood, and pressure-treated pine are all good choices for outdoor steps because they're resistant to rot and insect damage.
Q: How deep should the trench be for the concrete base?
A: The trench should be at least 4 inches deep, but it may need to be deeper depending on the size and weight of the steps.
Q: How do I make sure the steps are level?
A: Use a level to check the frame and treads at every step of the process. Make adjustments as needed to ensure that the steps are level and even.